Welcome, Guest. Please login or register.

Login with username, password and session length


Author Topic: My project begins...  (Read 11010 times)

mj2k

  • Guest
My project begins...
« on: October 26, 2021, 02:49:16 am »
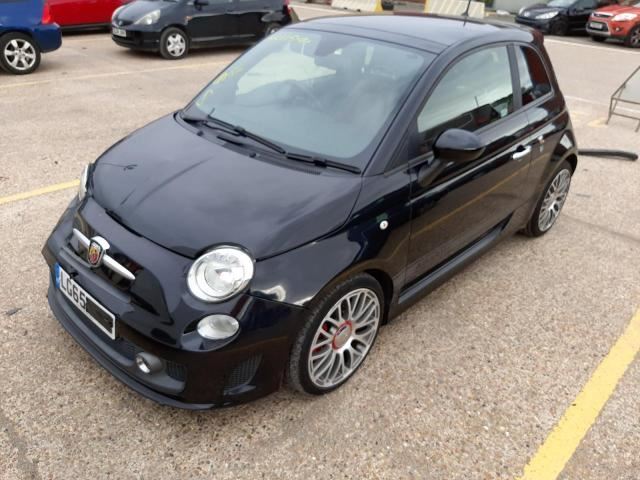
My 'new' Abarth arrived today, bought as a Cat N from Copart:

Not a bad looking car from one side:


But not quite so good from the other:


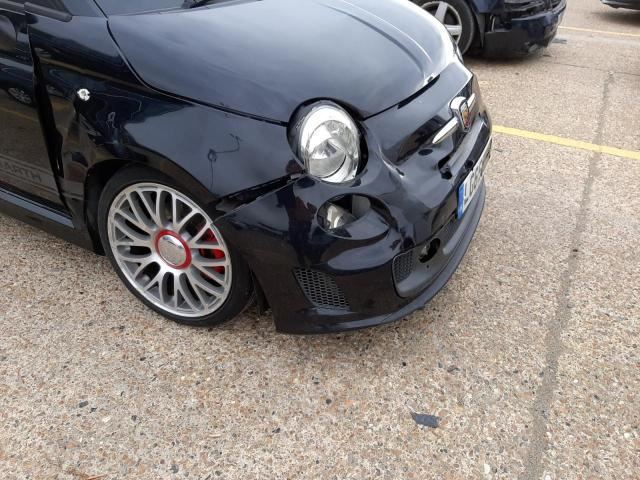
Drove off the lorry and into the garage under it's own steam, but noticed it was getting a quite hot considering it had moved so little. Checked the expansion tank - empty. So looks like I'll be needing a new radiator. And then did a quick measure of the distance between a headlight mount and the bulkhead - 2 cm different which was a bit worrying...


And then noticed the camber was a bit off:


Jacked it up and removed the o/s/f wheel - oh dear:


Still need to investigate why the wheel was grinding against the shock, but guess I'll be needing a new wheel (or set of wheels) and will definitely be needing the nice new Konis I bought

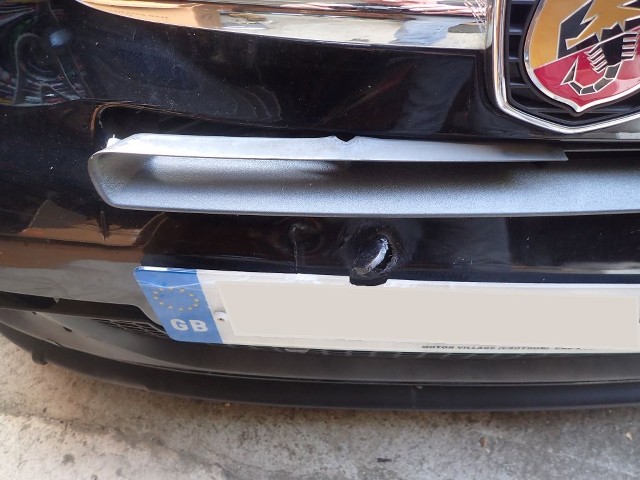
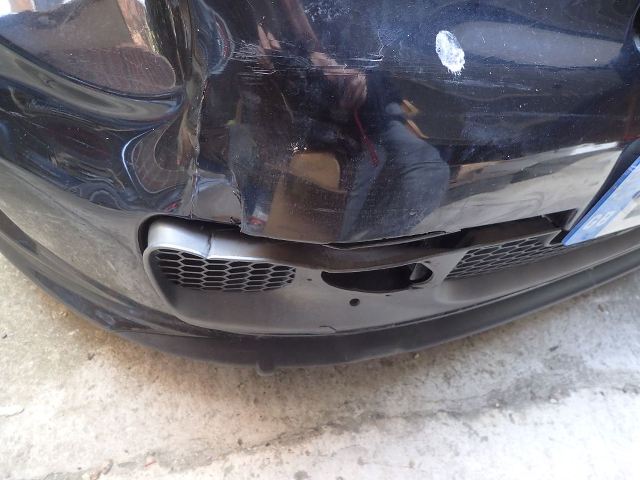
Then had a look at the bumper - it's worse than it appeared in the pics - the lower grille is damaged and there's a weirdly shaped hole in the middle. I'll get to that later...


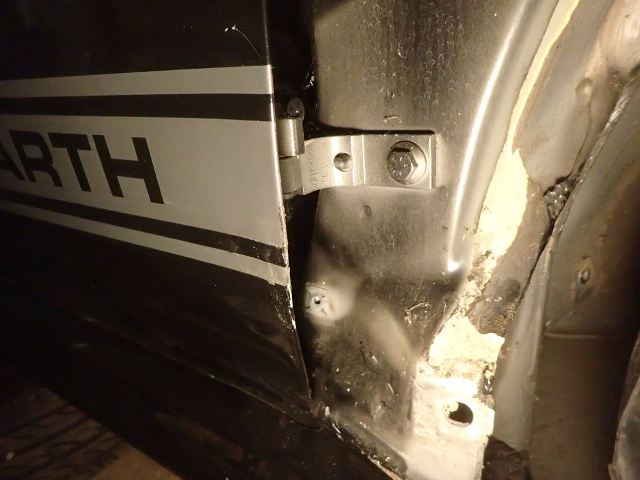
So set about removing the damaged front wing, needed to be done ASAP since it was damaging the driver's door. Bit of a faff because of the sealant and I ended up having to bend the door a little more to reach the top wing bolt:


Once the wing was off a bit of a 'tweak' with an edge setting tool sorted the door ok:


But I go a nasty surprise when I took the bumper off  :o


Looks like that hole in the bumper (and 2cm difference between headlight mounts) was caused by hitting a tow hook. Just goes to show how much damage that can cause...

Kept on stripping down until I finally came to good components (so I'll need offside headlights / indicator, rad, aircon condenser,  front panel and crash bar), and finally got to the turbo. Looks like the cat took a hit so I hope it isn't crumbling inside now.


So, a bit more of a project than I hoped. Still, it'll be interesting...

AbarthForum.co.uk

  • Advertisement
  • ***

    Offline 124Abarthreplica

    • Administrator
    • S2000 Member
    • *****
    • Posts: 2663
    • Carlo Rating: 15
      • Southampton
    Re: My project begins...
    « Reply #1 on: October 26, 2021, 12:49:38 pm »
    Can I suggest you start a new post in your very own garage? :thumb:

    https://www.abarthforum.co.uk/the-abarthisti-garage/

    mj2k

    • Guest
    Re: My project begins...
    « Reply #2 on: October 26, 2021, 12:53:42 pm »
    Sounds sensible, is there any way to move this post to there, or should I just copy / paste the text?

    Offline 124Abarthreplica

    • Administrator
    • S2000 Member
    • *****
    • Posts: 2663
    • Carlo Rating: 15
      • Southampton
    Re: My project begins...
    « Reply #3 on: October 26, 2021, 01:06:42 pm »
    I'll move it across when you open you new Abarth garage :thumb:

    Offline David_S_Walker

    • Abarth Wannabe
    • *
    • Posts: 29
    • Carlo Rating: 0
      • West Wales
    Re: My project begins...
    « Reply #4 on: October 26, 2021, 01:52:32 pm »
     Hello,

    I shall follow this with interest not because I need to do similar but because I watch your projects over on UKLegacy.com with more than the usual interest.

    Good luck!

    Best regards,

    David :thumb:

    mj2k

    • Guest
    Re: My project begins...
    « Reply #5 on: October 27, 2021, 12:30:29 am »
    Hello,

    I shall follow this with interest not because I need to do similar but because I watch your projects over on UKLegacy.com with more than the usual interest.

    Good luck!

    Best regards,

    David :thumb:

    Thanks :)

    Hopefully this won't turn into quite such a mad project as my last Legacy (350 bhp and the potential for 500 when I only wanted 200 was a bit daft), but assuming I can make it roadworthy again it'll be getting Brembos, Konis and lowering springs all round, etc. And if I can't, I guess my original idea of crossbreeding a breaker (albeit quite an expensive one!) with a normal 500c might well be back on the cards again...

    mj2k

    • Guest
    mj2k - very poorly 2015 Abarth 595 Turismo
    « Reply #6 on: October 27, 2021, 12:49:04 am »


    Spec: TBC once I know if I can bring it back to life!

    More images to follow, along with hopefully the project thread

    mj2k

    • Guest
    Re: mj2k - very poorly 2015 Abarth 595 Turismo
    « Reply #7 on: October 27, 2021, 12:57:21 am »
    My original plan was to buy a scrap Abarth 500 from Copart and transfer the engine, loom, interior, etc across to a plain old 500c.

    I'd spotted the above rather gorgeous looking beast on Copart and put in a speculative offer which didn't reach reserve, and since the seller didn't respond in the allocated window, thought no more about it.

    I then found cheap yellow 2010 500c with a black stripe (which I christened the bumblebee) which looked like the perfect candidate for my engine swap plans, since it had no crash damage recorded, and appeared to be in quite good condition except for ripped seats and 140k on the clock. I'd put down a deposit on it and was planning my journey to collect it when everything went a bit weird...

    Somehow my bid on the 'proper' Abarth got accepted even though it was outside the window, and I was then obliged to buy it. Which meant goodbye to the bumble bee (and my deposit and train tickets, which I'd bought to collect it), and hello to a pretty but somewhat more expensive than I intended Copart rescue.

    Still, it looked in fine condition except for the damaged o/s/f wing / lights and bumper, and seemed like an easy repair for a Cat N, so eagerly awaited it's arrival.

    Rest of the project thread to be transferred over hopefully :)


    mj2k

    • Guest
    Re: My project begins...
    « Reply #8 on: October 27, 2021, 01:02:06 am »

    mj2k

    • Guest
    Re: My project begins...
    « Reply #9 on: October 28, 2021, 12:10:24 am »
    Might as well carry on in here pending the move of the thread to the 'garage' forum since otherwise it'll be out of order...

    Some of the cosmetic parts I'd ordered to do the cosmetic job' I was expecting arrived today, so got busy with sorting the cosmetics.

    Firstly got busy fitting the replacement side indicator lens, and transferring across the bumper mount from the damaged wing:


    Then fitted the replacement lower light, and with a bit of gentle persuasion from a heat gun managed to reshape the bumper into something close to it's original form:


    Bottom part where the spotlight was mounted is still damaged and will need to sort that once the replacement spot arrives, but the replacement intercoolers all fit nicely now:


    Not perfect but it'll do 'til I have the cash and manage to find a better one in black.

    And finally, with a bit of help from my trusty edge setting tool, a block of wood and a g clamp, I reshaped the bottom bumper bar:


    I could most likely reshape the front panel to make it fit again too, but I need a proper straight panel as a template to check if anything else is damaged, so will leave that since I have a replacement coming. Upper crash bar is totally cream crackered of course.

    Next job is to remove the damaged strut so I can work out what's going on with the o/s/f wheel, but got caught out by the familiar bugbear of the strut top bolts being rusted into place, so still doing that one at the mo...

    mj2k

    • Guest
    Re: My project begins...
    « Reply #10 on: October 28, 2021, 10:10:57 am »
    I know why the wheel was so badly canted over now :D


    Never seen a banana-shaped strut before

    Once it was replaced the wheel angle looked much better:


    Replaced the spring of course at the same time, old springs were Eibach too but nowhere near as cut down:


    mj2k

    • Guest
    Re: My project begins...
    « Reply #11 on: October 29, 2021, 12:09:11 pm »
    Replaced the n/s/f wing (will need to get it sprayed later since it's still in primer) and fitted the other new Koni / Eibach spring to the n/s/f.

    Looking good, but the gap between the wheel and spring is still too small on the o/s/f so I need to figure out what else could be bent. The lower arm and mounts look fine so I suspect it's the hub carrier, but that seems unlikely since it's cast. Does anyone else have any ideas what may be causing the excessive negative camber?

    Offline 124Abarthreplica

    • Administrator
    • S2000 Member
    • *****
    • Posts: 2663
    • Carlo Rating: 15
      • Southampton
    Re: My project begins...
    « Reply #12 on: October 29, 2021, 03:42:31 pm »
    I would suggest taking a few measurements between easy to find points on the body/chassis and post them here.

    I'll compare with mine and perhaps other 500 owners will join in. :thumb:

    mj2k

    • Guest
    Re: My project begins...
    « Reply #13 on: October 29, 2021, 06:37:47 pm »
    I would suggest taking a few measurements between easy to find points on the body/chassis and post them here.

    I'll compare with mine and perhaps other 500 owners will join in. :thumb:

    Thanks, sounds like a plan  :thumb:

    I've got my replacement front panel / crash bar so I can finally pull it into some sort of shape, check panel gaps, etc and take some decent measurements. Even initial results look good before I've tightened it down properly - the gap between the front panel and bulkhead match on either side, though I do need to cut out and replace a damaged piece of crumple zone just behind the bumper bar (pics to follow).

    I've also ordered a new wishbone (it's bound to need replacing eventually) and a 2nd hand hub carrier to be on the safe side.

    mj2k

    • Guest
    Re: My project begins...
    « Reply #14 on: October 30, 2021, 12:16:52 pm »
    ...And yesterday my replacement front panel arrived. It's come from a much older car which presumably died of rust / neglect rather than crash damage, so though I'll need to do a bit of respraying and rust prevention I know it's not bent. If I'd bought one from a newer car I could almost guarantee it had come from another Copart victim so I might have been trying to align a bent panel with another bent panel, which would not be good.

    Fitted - it doesn't look bad at all. You may notice I've left the rad and aircon condenser off, the reasons for that will become clear...


    So refitted the intercoolers and headlights, along with the wing.


    Still looking good, and the distance between the front crossmember and the bulkhead has been returned to normal :slayer:


    Since all was looking good I fitted the reshaped front bumper, not looking bad at all, the lights all work and the 'check DRL' light has gone out


    Looks like it's almost ready for the road :)

    However, there is still one issue to sort (hence why I didn't fit the radiators) - the crumple zone on the bumper mount is bent.


    If I was really iffy and was just turning the car round for a quick buck I'd just stick a couple of washers in there and have done with it (a good reason to beware of Cat N / S cars if they've been repaired and are being sold on quick by a trader). But my plan is to make this car a 'keeper' if I enjoy driving it, so cut out the damaged section:


    I've got a new crumple zone panel on order via Ebay (a v lucky find) so it'll all have to come apart again once that panel arrives so I can weld it in. Been a while since I've done any welding, so I hope my skills aren't as rusty as some of the classics I used to patch together :D


    hungry